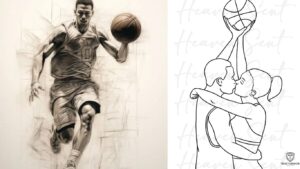
Drawing skeletons is a fascinating art form. It combines anatomy and creativity. This skill is crucial for artists and medical illustrators. Understanding skeletal structure improves figure drawing. It enhances character design in animation and comics.
Skeletal drawing teaches proportion and structure. It’s a foundational skill for any artist. Mastering skeleton drawing takes practice and patience. It opens up new artistic possibilities. Let’s explore the world of skeleton drawing together.
The Importance of Anatomy in Drawing
Anatomy knowledge is vital for artists. It brings realism to artwork. Understanding bone structure improves figure drawing. It helps create believable poses. Anatomy insight enhances character design. It allows for more dynamic compositions. Skeletal knowledge aids in depicting movement.
It improves the accuracy of proportions. Anatomy study deepens artistic understanding. It connects art with science. This knowledge base empowers artists. It allows for more confident creation. Anatomy mastery elevates artistic skill. It’s a lifelong journey of learning and application.
Getting Started with Drawing:9qs9xgbv4jo= Skeleton
Begin with basic shapes. Start with the skull and spine. Add the ribcage and pelvis. Sketch limbs as simple forms. Use reference materials. Practice regularly. Start with front and side views. Gradually attempt more complex poses.
Focus on proportions first. Details come later. Use light lines initially. Refine as you progress. Don’t fear mistakes. They’re part of learning. Experiment with different techniques. Find what works for you. Patience is key in this process. Enjoy the learning journey.
Key Tools for Drawing:9qs9xgbv4jo= Skeleton
| Tool | Purpose |
| Pencils (HB, 2B, 4B) | For sketching and shading |
| Eraser | For corrections and highlights |
| Sketchbook | To practice and document progress |
| Ruler | For measuring proportions |
| Anatomy references | For accuracy in drawings |
These tools are essential for skeleton drawing. Quality matters in art supplies. Invest in good pencils and paper. Digital tools are also options. Tablets and styluses offer versatility. Software like Procreate or Photoshop helps. Choose tools that feel comfortable. Experiment to find your preferences. Good tools enhance the drawing experience. They can improve your output quality.
Understanding Proportions in Skeleton Drawing
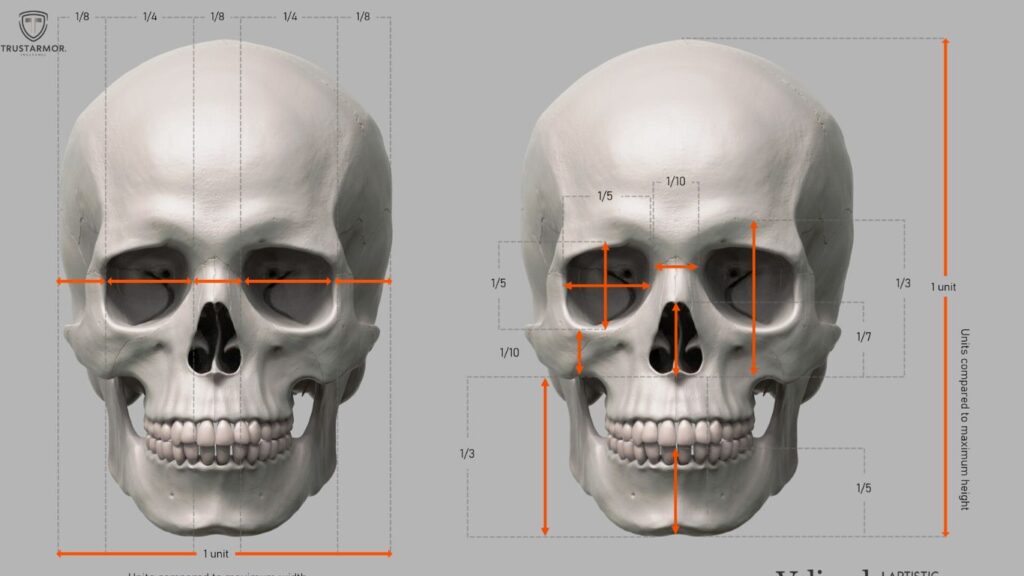
Proportions are crucial in skeleton drawing. The human skeleton follows specific ratios. The skull is about 1/8 of total height. The spine makes up 1/3 of the skeleton. Arm length equals leg length. The pelvis width is shoulder width. These ratios vary slightly person to person. Understanding them improves accuracy.
Practice measuring and comparing. Use a ruler or pencil for reference. Draw guidelines to maintain proportions. Check proportions regularly while drawing. Adjust as needed for accuracy. Mastering proportions takes time. It’s a fundamental skill in figure drawing.
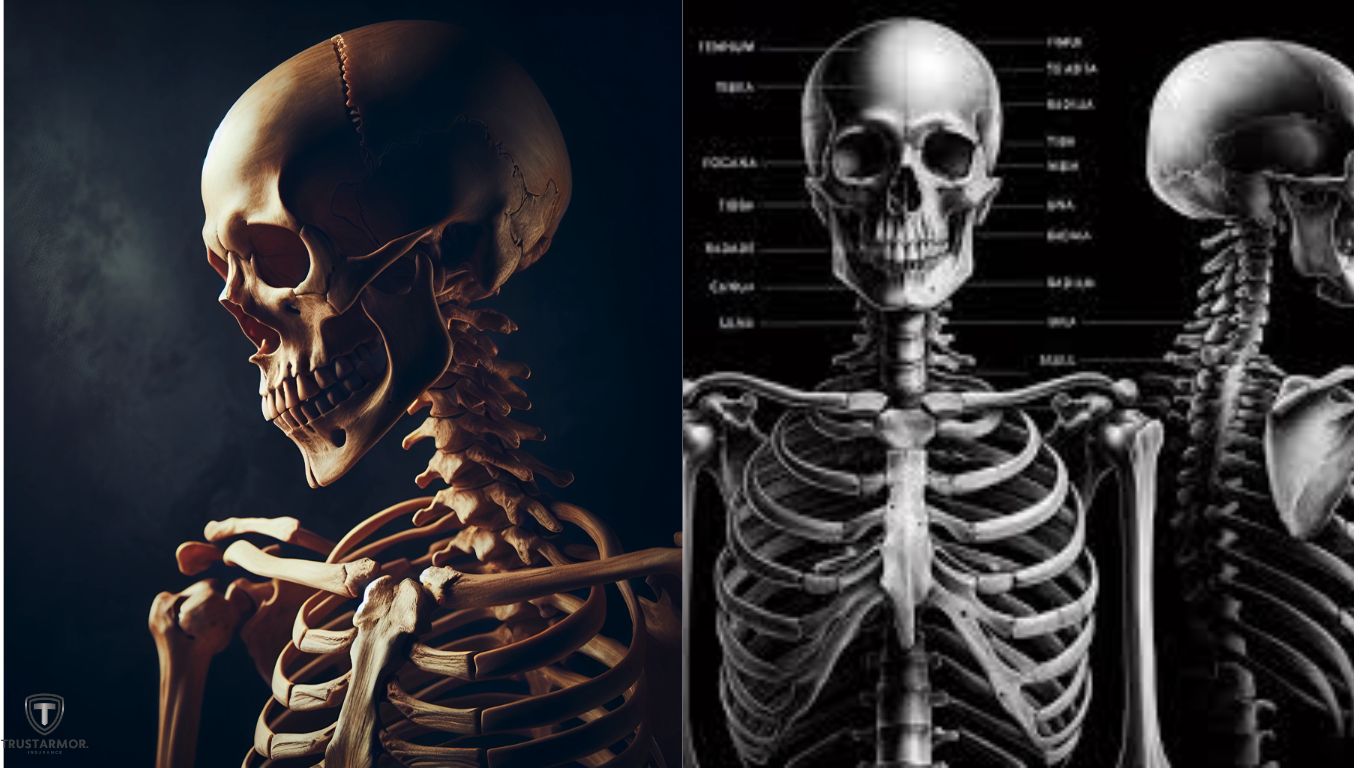
Breaking Down the Human Skeleton
Start with the axial skeleton. This includes skull, spine, and ribs. Then move to the appendicular skeleton. This covers limbs and girdles. The skull has 22 bones. The spine has 33 vertebrae. There are 12 pairs of ribs. Arms have 30 bones each. Legs contain 30 bones each.
Focus on major bones first. Add details progressively. Understanding connections is crucial. Note how bones articulate. This knowledge aids in depicting movement. Break complex forms into simple shapes. Build up complexity gradually. This approach simplifies the drawing process.
Techniques for Sketching the Skull
Begin with an oval shape. Add the jaw line. Mark eye sockets and nasal cavity. Note the zygomatic arches. Draw the teeth line. Add cranial sutures for detail. Use shading to show depth. Focus on major landmarks first.
The skull is symmetrical. Use guide lines for accuracy. Practice different angles. Front, side, and three-quarter views are essential. Study real skull references. Note individual variations. The skull expresses character. It’s central to portraiture. Master skull drawing for better portraits.
Drawing the Ribcage and Spine
The spine is the skeleton’s core. It’s an S-shaped curve. Start with a simple line. Add vertebrae shapes. The ribcage protects vital organs. It’s egg-shaped from the front. Elliptical from the side. Begin with basic shapes. Refine with individual ribs.
Note rib spacing and curvature. The sternum connects ribs in front. Floating ribs are unattached. Pay attention to rib cage flexibility. It changes with breathing and posture. This area is crucial for torso drawing. Master it for dynamic figure sketches.
Mastering the Pelvis and Limbs
The pelvis is the body’s foundation. It connects spine to legs. Start with a simplified bowl shape. Add iliac crests and hip joints. Limbs connect at shoulder and hip. Begin with simple cylinders for arms and legs. Add joints at elbow and knee.
Note how joints bend and rotate. Hands and feet are complex. Start with basic shapes. Add details progressively. Practice various limb positions. Understand how muscles attach to bones. This knowledge improves figure drawing. It adds realism to your sketches.
Adding Details and Refinements
After basic forms, add details. Focus on bone textures. Note ridges and protrusions. Add small bones in hands and feet. Refine joint areas. Pay attention to bone endings. Use shading to show depth. Highlight key anatomical features.
Add cranial sutures to the skull. Detail vertebrae in the spine. Refine rib connections. These details add realism. They show your understanding of anatomy. Balance detail with overall form. Don’t lose sight of the big picture. Details should enhance, not overwhelm.
Practicing with Different Poses
Variety in poses improves skills. Start with simple standing poses. Move to seated and reclining positions. Try dynamic action poses. Practice foreshortening techniques. Use reference photos or models. Sketch quick gesture drawings.
Focus on overall form first. Add details in longer studies. Experiment with unusual angles. Draw from imagination too. This tests your knowledge. Combine different pose elements. Create unique and interesting compositions. Regular practice is key. It builds muscle memory and confidence.
Using Technology in Skeleton Drawing
Digital tools offer new possibilities. Tablets provide pressure sensitivity. Software offers layers and undo features. 3D models can aid understanding. Digital anatomy atlases are useful references. Apps provide poseable figure models.
These tools complement traditional methods. They don’t replace fundamental skills. Use technology to enhance learning. Experiment with digital brushes and textures. Try both digital and traditional methods. Find what works best for you. Technology can speed up the process. It allows for easy corrections and iterations.
The Role of Light and Shadow
Light defines form in drawing. It reveals bone structure. Shadows add depth and dimension. Understand basic light principles. Use highlights on bone prominences. Cast shadows show spatial relationships. Reflected light softens shadows. Experiment with different light sources.
Side lighting reveals texture. Overhead light flattens forms. Underlight creates drama. Practice shading techniques. Use hatching and cross-hatching. Blend for smooth transitions. Light and shadow bring drawings to life. They transform flat sketches into 3D forms.
Evaluating Your Progress
Regular self-assessment is crucial. Compare your work over time. Note improvements in accuracy. Check proportions and anatomy knowledge. Seek feedback from peers or mentors. Join art communities for critiques. Keep a sketchbook for progress tracking.
Set specific goals for improvement. Celebrate small victories. Identify areas needing work. Be honest but kind in self-evaluation. Use constructive criticism to grow. Remember, progress is not always linear. Consistent practice leads to improvement. Patience and persistence are key.
Exploring Advanced Techniques
After mastering basics, explore further. Try different media like charcoal or ink. Experiment with mixed media techniques. Incorporate color for added dimension. Study écorché drawings. These show muscles on the skeleton.
Explore digital sculpting for 3D understanding. Try animation to show skeletal movement. Combine skeleton drawing with figure studies. Experiment with stylization and exaggeration. Push boundaries of realism and abstraction. Advanced techniques deepen your skills. They open new creative possibilities. Continuous learning keeps art fresh and exciting.
Finding Your Unique Style
Developing a personal style takes time. It emerges through practice and experimentation. Study various artists’ styles. Analyze what appeals to you. Incorporate elements you admire.
Adapt techniques to suit your vision. Don’t force a style; let it evolve. Your unique perspective is valuable. Experiment with line weight and texture. Play with proportions and exaggeration. Combine realistic and stylized elements.
Your style reflects your artistic voice. It makes your work recognizable. Embrace your quirks and preferences. Style development is an ongoing process. It evolves as you grow as an artist.
The Importance of Anatomy Knowledge
Anatomy knowledge deepens artistic understanding. It improves accuracy in figure drawing. Knowing bone structure aids in depicting movement. It helps in creating realistic poses.
Anatomy insight enhances character design. It allows for more convincing deformations. Understanding muscle attachments improves rendering. It helps in depicting weight and balance.
Anatomy knowledge aids in stylization. It informs which elements to exaggerate. This knowledge bridges art and science. It adds depth to artistic practice. Continuous study of anatomy is beneficial. It’s a lifelong learning process for artists.
Incorporating Background and Context
Backgrounds enhance skeleton drawings. They provide context and depth. Simple environments can be effective. They focus attention on the skeleton. Elaborate settings tell a story.
They can be symbolic or literal. Consider the skeleton’s placement. Use perspective to integrate it. Backgrounds can convey mood and atmosphere. They can contrast or complement the skeleton. Experiment with different settings. Try natural and artificial environments.
Use background elements to frame the subject. Balance detail between skeleton and background. Context adds meaning to anatomical drawings. It transforms studies into artistic compositions.
Frequently Asked Question
What’s the best way to start learning skeleton drawing?
Begin with basic shapes and proportions. Use references and practice regularly. Focus on major bones first before adding details.
How important is anatomy knowledge for artists?
It’s crucial. Understanding anatomy improves realism and helps in creating dynamic poses. It’s fundamental for figure drawing.
Can digital tools replace traditional drawing methods?
Digital tools complement traditional methods. They offer new possibilities but don’t replace fundamental skills. Use both for best results.
How long does it take to master skeleton drawing?
Mastery is an ongoing process. Consistent practice over months or years leads to significant improvement. Everyone progresses differently.
Is it necessary to memorize all bones for effective drawing?
Memorizing all bones isn’t essential. Focus on major structures and their relationships. Detailed knowledge comes with practice and study.
Conclusion
Mastering skeleton drawing is a journey. It combines art and science. Regular practice is key to improvement. Start with basics and build complexity. Use references and study anatomy. Experiment with different techniques and tools.
Develop your unique style over time. Remember, progress takes patience. Each drawing is a learning opportunity. Embrace the process of discovery. Skeleton drawing enhances overall artistic skills. It deepens understanding of the human form.
This knowledge applies to various art forms. Keep exploring and pushing your boundaries. The art of skeleton drawing is both challenging and rewarding. It opens doors to deeper artistic expression. Enjoy the journey of continuous learning and creation.
As the founder of TrustArmorInsurance, [Admin] the site in 2024 to offer reliable insurance solutions with a focus on trust and security. With a commitment to providing top-notch coverage and personalized service, TrustArmorInsurance aims to meet diverse needs with integrity and professionalism.